Selasa, 31 Maret 2015

Belajar Android Studio dengan Membuat Aplikasi Android Sederhana

Belajar Android Studio dengan Membuat Aplikasi Android Sederhana

Setelah tahapan instalasi selesai dilakukan, kita lanjut dengan membuat aplikasi sederhana dengan Android Studio.
Dalam belajar sesuatu yang baru biasanya saya belajar dari hal yang mudah-mudah dulu. Ibarat belajar matematika kia tahu angka dulu baru belajar pertambahan, pengurangan, perkalian dan pembagian. Coba bayangkan bisakah kita memahami penambahan dalam matematika kalau tidak tahu angka. Begitu juga dalam pembuatan aplikasi bisakah kita buat aplikasi Android yang kompleks dan banyak fitur kalau membuat aplikasi yang sederhana saja tidak bisa.
Aplikasi Android sederhana yang akan kita buat adalah aplikasi yang dapat membantu kita menghitung luas persegi panjang.
Sekarang mari kita mulai
1. Buka Android Studio lalu pilih Start a new Android Studio Project.

Akan tampil jendela Create New Project, isikan seperti di bawah ini.

Klik Next lalau centang Phone and Tablet

Klik Next, lalu pilih Blank Activity
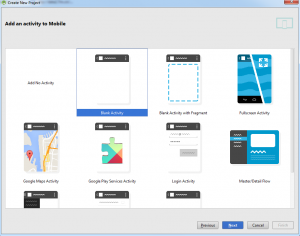
Klik Next, dan isi Activity Name dan lainnya seperti dibawah ini.

Setelah itu Klik Finish. Maka secara otomatis menampilkan project yang kita buat.
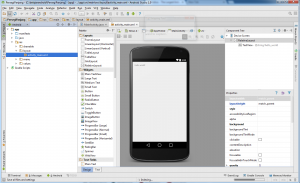
Disini langsung diperlihatkan layout tampilan activity_main.xml. Dan bisa kita langsung run.
Jika kita punya Device Android silahkan connectkan ke komputer melalui usb port.
Klik Tombol Run maka akan muncul pilihan aplikasi uang dirun dimana. Karena saya sudah menghubungkan Android Moto G saya ke komputer, maka Moto G saya akan muncul Jendela Choose Device. Agar lebih cepat runnya Kita pilih saja Choose Running Device.
Jika tidak punya device maka bisa pilih “Launch Emulator” kemidan klik OK

Maka hasil tampilannya adalah seperti ini.

Loh aplikasi persegi panjang kok isinya Hello World. Harusnya kan ada inputan panjang dan lebar.
2. Untuk menambahkan inputan panjang dan lebar maka kita harus mengedit file layoutnya dalam hal ini activity_main.xml untuk itu replace kode yang ada pada file tersebut dengan kode dibawah ini.
01RelativeLayout xmlns:android="http://schemas.android.com/apk/res/android"
02    xmlns:tools="http://schemas.android.com/tools" android:layout_width="match_parent"
03    android:layout_height="match_parent" android:paddingLeft="@dimen/activity_horizontal_margin"
04    android:paddingRight="@dimen/activity_horizontal_margin"
05    android:paddingTop="@dimen/activity_vertical_margin"
06    android:paddingBottom="@dimen/activity_vertical_margin" tools:context=".MainActivity"
07    android:id="@+id/relativeLayout">
08 
09    <TextView
10        android:layout_width="wrap_content"
11        android:layout_height="wrap_content"
12        android:text="Panjang"
13        android:id="@+id/textView"
14        android:layout_alignParentTop="true"
15        android:layout_alignParentLeft="true"
16        android:layout_alignParentStart="true" />
17 
18    <EditText
19        android:layout_width="wrap_content"
20        android:layout_height="wrap_content"
21        android:inputType="number"
22        android:ems="10"
23        android:id="@+id/editTextPanjang"
24        android:layout_below="@+id/textView"
25        android:layout_alignParentLeft="true"
26        android:layout_alignParentStart="true"
27        />
28 
29    <TextView
30        android:layout_width="wrap_content"
31        android:layout_height="wrap_content"
32        android:text="Lebar"
33        android:id="@+id/textView2"
34        android:layout_below="@+id/editTextPanjang"
35        android:layout_alignParentLeft="true"
36        android:layout_alignParentStart="true" />
37 
38    <EditText
39        android:layout_width="wrap_content"
40        android:layout_height="wrap_content"
41        android:inputType="number"
42        android:ems="10"
43        android:id="@+id/editTextLebar"
44        android:layout_below="@+id/textView2"
45        android:layout_alignParentLeft="true"
46        android:layout_alignParentStart="true" />
47 
48    <Button
49        android:layout_width="wrap_content"
50        android:layout_height="wrap_content"
51        android:text="Hitung Luas"
52        android:id="@+id/buttonHitungLuas"
53        android:layout_below="@+id/editTextLebar"
54        android:layout_alignParentLeft="true"
55        android:layout_alignParentStart="true" />
56 
57    <TextView
58        android:layout_width="wrap_content"
59        android:layout_height="wrap_content"
60        android:text="Luas"
61        android:id="@+id/textView3"
62        android:layout_below="@+id/buttonHitungLuas"
63        android:layout_alignParentLeft="true"
64        android:layout_alignParentStart="true" />
65 
66    <EditText
67        android:layout_width="wrap_content"
68        android:layout_height="wrap_content"
69        android:inputType="number"
70        android:ems="10"
71        android:id="@+id/editTextLuas"
72        android:layout_below="@+id/textView3"
73        android:layout_alignParentLeft="true"
74        android:layout_alignParentStart="true" />
75</RelativeLayout>
Nah salah satu android studio ini adalah kita bisa langsung lihat previewnya
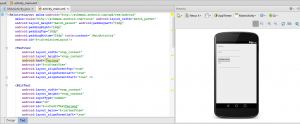
3. Setelah layout selesai sekarang mari kita kerjakan otak dari aplikasi ini yaitu bagian javanya. Buka MainActivity.java lalu ketikan kode berikut.
01package net.agusharyanto.persegipanjang;
02 
03import android.support.v7.app.ActionBarActivity;
04import android.os.Bundle;
05import android.view.Menu;
06import android.view.MenuItem;
07import android.view.View;
08import android.widget.Button;
09import android.widget.EditText;
10 
11public class MainActivity extends ActionBarActivity {
12 
13    private EditText edtPanjang;
14    private EditText edtLebar;
15    private EditText edtLuas;
16    private Button btnHitungLuas;
17    @Override
18    protected void onCreate(Bundle savedInstanceState) {
19        super.onCreate(savedInstanceState);
20        setContentView(R.layout.activity_main);
21        initUI();
22        initEvent();
23    }
24 
25    private void initUI(){
26        edtPanjang = (EditText) findViewById(R.id.editTextPanjang);
27        edtLebar = (EditText) findViewById(R.id.editTextLebar);
28        edtLuas = (EditText) findViewById(R.id.editTextLuas);
29        btnHitungLuas = (Button) findViewById(R.id.buttonHitungLuas);
30    }
31 
32    private void initEvent(){
33        btnHitungLuas.setOnClickListener(new View.OnClickListener() {
34            @Override
35            public void onClick(View v) {
36                hitungLuas();
37            }
38        });
39    }
40 
41    private void hitungLuas(){
42        int panjang = Integer.parseInt(edtPanjang.getText().toString());
43        int lebar = Integer.parseInt(edtLebar.getText().toString());
44        int luas = panjang*lebar;
45        edtLuas.setText(luas+"");
46    }
47 
48    @Override
49    public boolean onCreateOptionsMenu(Menu menu) {
50        // Inflate the menu; this adds items to the action bar if it is present.
51        getMenuInflater().inflate(R.menu.menu_main, menu);
52        return true;
53    }
54 
55    @Override
56    public boolean onOptionsItemSelected(MenuItem item) {
57        // Handle action bar item clicks here. The action bar will
58        // automatically handle clicks on the Home/Up button, so long
59        // as you specify a parent activity in AndroidManifest.xml.
60        int id = item.getItemId();
61 
62        //noinspection SimplifiableIfStatement
63        if (id == R.id.action_settings) {
64            return true;
65        }
66 
67        return super.onOptionsItemSelected(item);
68    }
69}
4. Kalau dulu di eclipse untuk konfigurasi aplikasi ada difile AndroidManifest.xml, kalau di Android Studio konfigurasinya ada pada file build.gradle (module:app)
01apply plugin: 'com.android.application'
02 
03android {
04    compileSdkVersion 21
05    buildToolsVersion "21.1.2"
06 
07    defaultConfig {
08        applicationId "net.agusharyanto.persegipanjang"
09        minSdkVersion 15
10        targetSdkVersion 21
11        versionCode 1
12        versionName "1.0"
13    }
14    buildTypes {
15        release {
16            minifyEnabled false
17            proguardFiles getDefaultProguardFile('proguard-android.txt'), 'proguard-rules.pro'
18        }
19    }
20}
21 
22dependencies {
23    compile fileTree(dir: 'libs', include: ['*.jar'])
24    compile 'com.android.support:appcompat-v7:21.0.3'
25}
6.Sekarang mari kita run aplikasi kita. Saya sarankan kita punya Handphone Android jadi kita bisa langsung Run ke HP. Karena kalau ke Run menggunakan Emulator itu lambat dan banyak makan Resource komputer kita
Hasil dari aplikasi kita

Isikan nilai Panjang dan Lebar kemudian sentuh tombol Hitung Luas
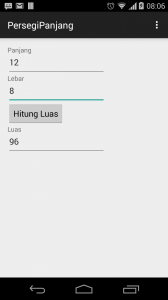
Mudahkan buat aplikasi android dengan android studio.

sumber : http://agusharyanto.net/wordpress/?p=1269

Senin, 30 Maret 2015

install eclipse di ubuntu

This quick tutorial is going to show you how to install the latest release of Eclipse, while the Ubuntu repositories has an very old version.
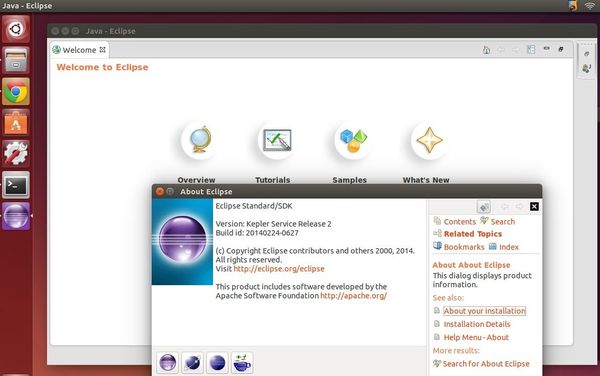
So far, the latest is Eclipse Kepler (4.3.2). You can follow below steps to install it on Ubuntu 14.04 or other Ubuntu releases.
Eclipse Kepler (4.3.2) in Ubuntu 14.04 Unity
1. Install Java.
If you don’t have Java installed on your system. Click the link below to bring up Ubuntu Software Center and click install OpenJDK Java 7:
Or, install Oracle Java from this link.
2. Download Eclipse from its website
or https://www.eclipse.org/downloads/packages/eclipse-standard-432/keplersr2
You may check out your OS Type 32-bit or 64-bit by going to System Settings -> Details -> Overview
Download Eclipse for Linux
3. Extract Eclipse to /opt/ for global use
Press Ctrl+Alt+T on keyboard to open the terminal. When it opens, run the command below to extract Eclipse to /opt/:
cd /opt/ && sudo tar -zxvf ~/Downloads/eclipse-*.tar.gz
You may replace “eclipse-*.tar.gz” (without quote) to the exact package name if the command does not work.
Don’t like Linux commands? You can do this by opening Nautilus file browser via root: Press Alt+F2 -> run gksudo nautilus.
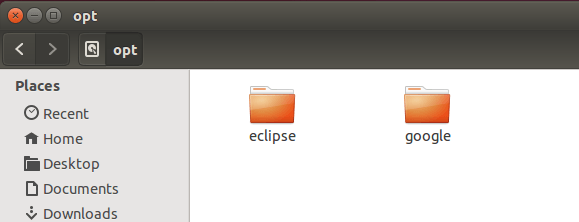
Once done, you should see the eclipse folder under /opt/ directory.
Eclipse in /opt/ for global use
4. Create a launcher shortcut for Eclipse
Press Ctrl+Alt+T, paste below command into the terminal and hit enter.
gksudo gedit /usr/share/applications/eclipse.desktop
Above command will create and open the launcher file for eclipse with gedit text editor.
Paste below content into the opened file and save it.
[Desktop Entry]
Name=Eclipse 4
Type=Application
Exec=/opt/eclipse/eclipse
Terminal=false
Icon=/opt/eclipse/icon.xpm
Comment=Integrated Development Environment
NoDisplay=false
Categories=Development;IDE;
Name[en]=Eclipse
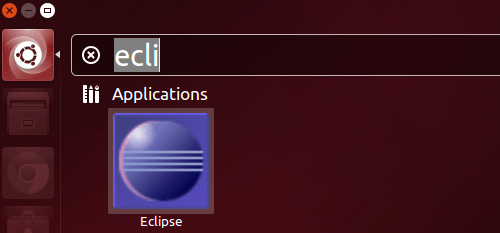
Finally open Eclipse from Unity Dash search results and enjoy!
launch eclipse in ubuntu 14.04

Installing the Eclipse Plugin

Android offers a custom plugin for the Eclipse IDE, called Android Development Tools (ADT). This plugin provides a powerful, integrated environment in which to develop Android apps. It extends the capabilities of Eclipse to let you quickly set up new Android projects, build an app UI, debug your app, and export signed (or unsigned) app packages (APKs) for distribution.
If you need to install Eclipse, you can download it from eclipse.org/mobile.
Note: If you prefer to work in a different IDE, you do not need to install Eclipse or ADT. Instead, you can directly use the SDK tools to build and debug your application.

Download the ADT Plugin


  1. Start Eclipse, then select Help > Install New Software.
  2. Click Add, in the top-right corner.
  3. In the Add Repository dialog that appears, enter "ADT Plugin" for the Name and the following URL for the Location:
    https://dl-ssl.google.com/android/eclipse/
  4. Click OK.
    If you have trouble acquiring the plugin, try using "http" in the Location URL, instead of "https" (https is preferred for security reasons).
  5. In the Available Software dialog, select the checkbox next to Developer Tools and click Next.
  6. In the next window, you'll see a list of the tools to be downloaded. Click Next.
  7. Read and accept the license agreements, then click Finish.
    If you get a security warning saying that the authenticity or validity of the software can't be established, click OK.
  8. When the installation completes, restart Eclipse.

Configure the ADT Plugin


Once Eclipse restarts, you must specify the location of your Android SDK directory:
  1. In the "Welcome to Android Development" window that appears, select Use existing SDKs.
  2. Browse and select the location of the Android SDK directory you recently downloaded and unpacked.
  3. Click Next.
Your Eclipse IDE is now set up to develop Android apps, but you need to add the latest SDK platform tools and an Android platform to your environment. To get these packages for your SDK, continue to Adding Platforms and Packages.

Troubleshooting Installation


If you are having trouble downloading the ADT plugin after following the steps above, here are some suggestions:
  • If Eclipse can not find the remote update site containing the ADT plugin, try changing the remote site URL to use http, rather than https. That is, set the Location for the remote site to:
    http://dl-ssl.google.com/android/eclipse/
  • If you are behind a firewall (such as a corporate firewall), make sure that you have properly configured your proxy settings in Eclipse. In Eclipse, you can configure proxy information from the main Eclipse menu in Window (on Mac OS X, Eclipse) > Preferences > General > Network Connections.
If you are still unable to use Eclipse to download the ADT plugin as a remote update site, you can download the ADT zip file to your local machine and manually install it:
  1. Download the ADT Plugin zip file (do not unpack it):
    PackageSizeMD5 Checksum
    ADT-21.1.0.zip13564671 bytesf1ae183891229784bb9c33bcc9c5ef1e
  2. Start Eclipse, then select Help > Install New Software.
  3. Click Add, in the top-right corner.
  4. In the Add Repository dialog, click Archive.
  5. Select the downloaded ADT-21.1.0.zip file and click OK.
  6. Enter "ADT Plugin" for the name and click OK.
  7. In the Available Software dialog, select the checkbox next to Developer Tools and click Next.
  8. In the next window, you'll see a list of the tools to be downloaded. Click Next.
  9. Read and accept the license agreements, then click Finish.
    If you get a security warning saying that the authenticity or validity of the software can't be established, click OK.
  10. When the installation completes, restart Eclipse.
To update your plugin once you've installed using the zip file, you will have to follow these steps again instead of the default update instructions.

Other install errors

Note that there are features of ADT that require some optional Eclipse packages (for example, WST). If you encounter an error when installing ADT, your Eclipse installion might not include these packages. For information about how to quickly add the necessary packages to your Eclipse installation, see the troubleshooting topic ADT Installation Error: "requires plug-in org.eclipse.wst.sse.ui".

For Linux users

If you encounter this error when installing the ADT Plugin for Eclipse:
An error occurred during provisioning.
Cannot connect to keystore.
JKS
...then your development machine lacks a suitable Java VM. Installing Sun Java 6 will resolve this issue and you can then reinstall the ADT Plugin.

sumber : https://stuff.mit.edu/afs/sipb/project/android/docs/sdk/installing/installing-adt.html

Kamis, 26 Maret 2015

Cara Remastering Linux Menggunakan Remastersys

Apa itu remastering?
Remastering (istilah diambil dari proses produksi audio)adalah merupakan suatu proses mengubah perangkat lunak untuk distribusi pribadi atau penggunaan “off-label” (dan distribusi yang sering, tergantung pada legalitas hukum yang terlibat)

Apa itu remastersys?
Remastersys adalah tool yang dapat digunakan untuk mengatur beberapa hal untuk melakukan remastering, Remastering dapat melakukan beberapa hal,yaitu:

  • Membuat full backup termasuk personal data untuk livecd / dvd yang dapat kita bawa kemana saja atau di install.
  • Membuat copy yang dapat di share dengan teman, yang tidak ada data personal di dalamnya.
  • Membangun master iso dari sistem operasi yang telah anda instal.
  • Mengatur Customize distro yang akan dibangun.
  • Mengubah grub image
  • Mengubah splash screen
Apa sih tujuan remastering?
Remastering memiliki banyak tujuan,diantaranya:
  • Membuat linux sendiri sesuai kebutuhan
  • Mengperbaiki bug yang ada pada distro sebelumnya
  • Merubah kernel agar sistem lebih compatible terhadap hardware yang ada pada pc/laptop
  • merubah interface dan tampilan agar desktop lebih friendly bagi user/pengguna


Skema remastering
Instal Linux >update>upgrade>oprek>membangun master iso

Persiapan sebelum remastering
  • Update
  • Upgrade
  • Mengganti/update kernel
  • Menambah/mengurangi palikasi
  • Mengganti Theme dan Background
  • Mengganti Login screen GDM/KDM
  • Mengganti pymouth
  • Save settingan/mengatur default
  • Membangun master iso dengan remastersys
Langkah Langkah Remastering
  • Instal linux ubuntu/mint
  • Update linux
    Buka terminal lalu ketikan;
    $ sudo apt-get update
  • Upgrade linux
    Buka terminal lalu ketikan;
    $ sudo apt-get upgrade
  • Update kernel
    Buka terminal lalu ketikan;
    sudo add-apt-repository ppa:francisbrwn9/kernels
    sudo apt-get update
    sudo apt-get dist-upgrade
    setelah terinstal,restart komputer.
  • Menambah/mengurangi paket aplikasi
    Buka synaptic package manager
    Remove/instal apliksi sesuai kebutuhan

    "Pada tahap ini anda juga bisa langsung menginstal desktop environment baik itu xfce,lxde.kde dan sebagainya
  • Mengganti backrgound
    Jika anda menggunakan  desktop gnome shell,maka taruh file anda di
    /usr/share/background

    Dan untuk script nya terletak di
    /usr/share/gnome-background-properties
  • Menggaanti icon
    Silahkan ganti icon di
    /usr/share/icons
  • Mengganti Login screen
    Buka terminal lalu ketikan;
  • gksu -u gdm dbus-launch gnome-appearance-properties

    atau bisa langsung anda ganti menggunakan ubuntu tweak

  • Mengganti Plymouth
    Buka terminal lalu ketikan;
  •  sudo update-alternatives --config default.plymouth

    lalu pilih/ketikan nomer plymouth yang telah tersedia
    Setelah itu ketikan;
    sudo update-initramfs -u
  • Mengganti nama os
    Ubah pada file lsb.realese,issue,dan issue.net
    Semua itu terletak di /etc
  • Membangun file iso
    Buka remastersys,
    pilih "Make  distributable copy to share with friend
sumber : http://empuekoraharjo.blogspot.com/2013/12/cara-remastering-linux-menggunakan.html
 
cara ke 2 

Pasang tool untuk melakukan remaster, kali ini kita akan memakai remastersys. Instalasi remastersys dan remastersys-gui:
Tambahkan Repository “Remastersys” ke sources.list anda dengan mengetikan perintah berikut ini di Terminal :
sudo gedit /etc/apt/sources.list
Setelah muncul Text Editor, Tambahkan link repo dibawah ini ke akhir baris sources.list.
Lalu “save” keluar Text Editor.
Update Repository kita dengan perintah berikut.
sudo apt-get update
Kalo udah abis update muncul error seperti berikut:
W: GPG error: http://www.remastersys.com precise InRelease: The following signatures couldn’t be verified because the public key is not available: NO_PUBKEY B6068D255563B350
Salin perintah berikut pada terminal anda:
sudo apt-key adv -recv-key -keyserver keyserver.ubuntu.com B6068D255563B350
Install Remastersys, dengan mengetikan berikut ini ke Terminal.
sudo apt-get install remastersys
sudo apt-get install remastersys-gui
setelah instalasi selesai, makan remastersys akan muncul di ubuntu menu kita. Kalaupun tidak muncul, kita bisa mencarinya di kotak pencarian dengan mengetikkan remastersys
Ketiga. Menggunakan remastersys. Berikut adalah keterangan mengenai option-option pada remastersys:
remastersys
1. BACKUP
Jika memilih ini, maka file data yang terdapat pada home kita akan ikut masuk ke dalam file ISO yang dihasilkan oleh remastersys
2.  DISTRIBUTION
Pilihan ini akan menghasilkan file ISO tanpa mengikutsertakan data file yang terdapat pada folder HOME
3. CUSTOMIZE
Jika anda mengklik menu ini, anda akan disuguhkan window baru yang berisi tombol untuk mensetting remsastering ubuntu agan. seperti mensetting playmouth, background grub, dll. Kurang lebih tampilannya seperti dibawah ini.
4. CLEAR WORKING FOLDER
Menu ini berfungsi untuk menghapus file sisa kerja remastering sebelumnya yang sudah dipindahkan.
5. CHECK LOG
Ini berfungsi pada saat terjadi error pada saat anda melakukan remasing, jika terjadi error coba anda buka log ini dengan mengklik tombol ini, dan coba anda pahami pesan error tersebut, jika anda tidak mengerti juga anda bisa mencarinya di search engine google.
NOTE : Jika berhasil maka akan muncul file *.ISO yang berada pada directory “/home/remastersys/remastersys/”. File Iso tersebut bisa anda burning ke DVD atau flaskdisk, atau bisa juga anda sebar ke teman-teman yang lain.

sumber : https://wetansumur.wordpress.com/2014/07/15/membuat-distro-linux-sendiri-remastering-linux-based-on-ubuntu/